Sport Fishing Photography – Taking your Sailfish or Marlin Home With You – With Photogrpahy
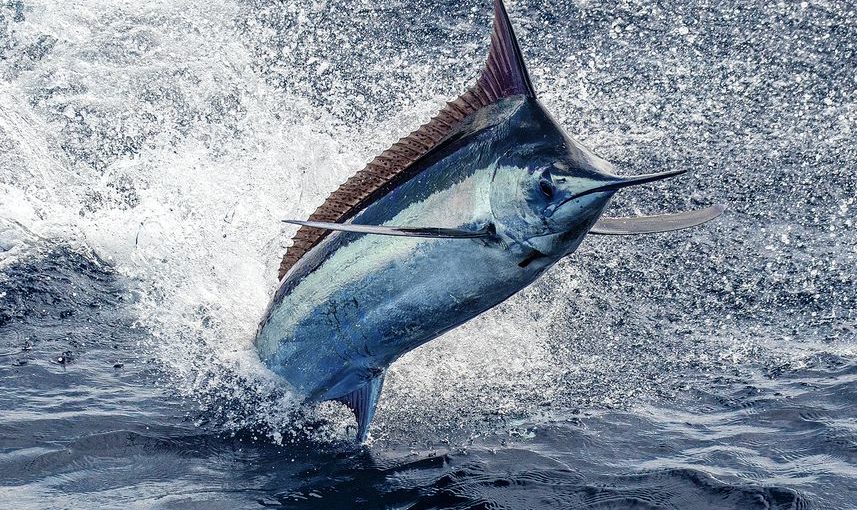
You can’t take your billfish home with you, but here are some tips to take blue water fishing photos you can keep for a lifetime.
By Capt. Jen Copeland
November 3, 2020

Four professionals give their advice on how you set up for a jumping sailfish or marlin shot.
Scott Kerrigan on Billfish Photography

Scott Kerrigan, Fort Lauderdale, Florida.
All the finest techno settings and most expensive equipment won’t help your final sport fishing image if you end up shooting through someone’s head or a rocket launcher full of fishing rods. A portion of your best setup time should be spent on your surroundings. I shoot from the cockpit, so it’s imperative that I know how the crew responds, and where they are going in a few basic scenarios. Study their movements during a bait-and-switch; know where the tag stick and line cutters are stored before the leader pops up. This understanding can help keep you and your camera in an unobstructed place as you move around the boat during a battle with sailfish.
Harry R. Hindmarsh Advice for Taking Billfish Photos

Harry R. Hindmarsh, Virginia Beach, Virginia. Courtesy Harry R. Hindmarsh
Two things I do whenever photographing billfish is to pre-focus and adjust my shutter speed. If the last photo I snapped was 30 yards away, then that’s where my focus is set. But if a billfish is busting a flat line or teaser, then my lens must be refocused to 10 yards. The time it takes to refocus from 30 to 10 yards is usually enough to miss the shot, so I’ll have one camera set up and pre-focused for teaser distance and one for rigger bites. Blue and black marlin and sailfish jump at different speeds, so I always adjust my shutter based on the species of billfish—the faster the fish, the faster the shutter speed.
Richard Gibson on Capturing Billfish on Camera

Richard Gibson, Homestead, Florida.Courtesy Richard Gibso
Capturing magazine-quality pictures of sailfish and marlin is extremely difficult. First, you must get yourself to a destination that offers plenty of opportunities, and the weather is always a consideration. I have two mottoes: 1) If the camera can fall, it will; and 2) salt water always wins. If it’s rough, then stay on the bridge and shoot from there. Use a large focal-length zoom lens, and put your camera on shutter priority mode so you can set the shutter speed manually—up to 1/8000 of a second—and freeze the jumping fish. Ask the mates to hold onto the fish a few seconds longer, and you might be awarded a great image—and don’t forget to shoot vertically, if you want a cover-worthy one.
Fishing Photography Tips from Carol Lynne

Carol Lynne, Kona, Hawaii.
I keep two cameras—each with a different lens—ready to go right inside the salon door. Once the fishing lures are out, I adjust my settings according to the light. On the bite, I grab my camera with the longest lens and start shooting. Sometimes the best jump shots are right after the hookup. When the fish settles down, I will keep an eye on the line and be ready to shoot as it angles toward the surface. Then, when the fish is close, I switch cameras and head up to the tower. I like the perspective up there, and with no obstructions, it’s a great place to get both leader and release shots.
You May Also Like:
Post Covid Fishing in Costa Rica
Billfish Anglers Guide to Costa Rica
Subscribe to Our Mailing List
[yikes-mailchimp form=”1″]

